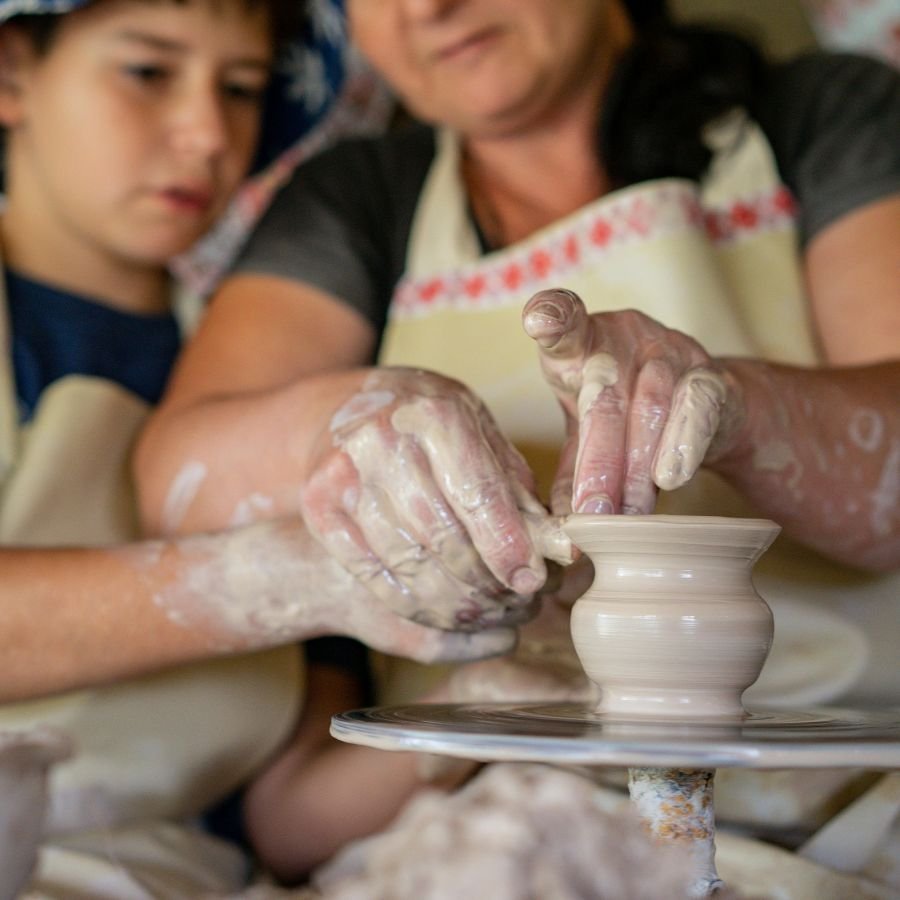
Pottery is one of the most exciting and hands-on art forms for children. Kids naturally love to touch, squish, roll, and mould clay, which makes pottery an ideal activity for sparking creativity and developing fine motor skills. But behind every joyful experience is a skilled instructor who understands how to make the learning process both fun and educational. Teaching pottery to kids requires patience, creativity, and a child-friendly approach that keeps them engaged from start to finish.
In this article, we explore how pottery instructors make the learning journey enjoyable, the specific techniques they use, the environment they create, and why pottery is such a beneficial activity for children. Whether you’re a parent considering classes or a studio looking to improve your teaching format, this guide covers it all.
Understanding How Kids Learn Through Pottery
The Role of Sensory Play in Pottery
Children learn best through sensory experiences, and clay provides the perfect medium for tactile exploration. The simple act of pressing, squeezing, and shaping clay helps kids understand textures and pressure while strengthening their hand muscles.
When kids feel the cool, soft surface of clay, they instantly connect with the material. This sensory bond helps maintain their attention and encourages free expression.
Encouraging Creativity and Imagination
Kids are naturally imaginative, and pottery gives them the freedom to create anything they picture in their minds. Instructors often avoid strict rules, allowing children to turn their ideas into clay forms—whether it’s a mini animal, a monster, or a pretend food item.
By mixing creativity with guidance, instructors help spark imagination without limiting the child’s originality.
Building Confidence Through Hands-On Activities
Small achievements in pottery—like making a shape or designing a pattern—boost a child’s confidence. Instead of focusing on perfection, instructors celebrate effort and creativity. This helps children feel proud of their work, encouraging them to try more challenging projects over time.
Fun and Child-Friendly Teaching Methods Used by Pottery Instructors
1. Demonstration-Based Learning
Kids learn best by watching. Pottery for kids instructors start with short, simple demonstrations that visually explain what to do. They exaggerate hand movements, slow down the steps, and use easy language so children instantly understand how to shape the clay.
2. Play-Based Pottery Activities
Children love games, so instructors turn pottery into playful experiences. Some engaging activities include:
-
Clay Monster Challenge – create the funniest monster
-
Animal Crafting – make your favourite pet
-
Clay Pizza Game – shape ingredients and build your own pizza
These games transform learning into fun, keeping kids actively involved.
3. Storytelling-Driven Projects
Storytelling helps kids think creatively. Instructors often use imaginative stories such as:
“Today we’re making little houses for magical creatures.”
This method gives kids a theme to follow, making the process more enjoyable and meaningful.
4. Using Bright Colours and Fun Tools
Children love colourful and visually exciting materials. That’s why instructors use:
-
Bright clay tools
-
Rolling pins
-
Pattern stamps
-
Cookie cutters
-
Kid-safe sculpting tools
These tools not only help shape the clay but also make the experience visually appealing.
5. Hands-On Practice Sessions
Pottery instructors prioritise doing over explaining. Kids spend most of the session touching, moulding, and experimenting with clay. Short instructions + long practice = maximum engagement and learning.
Step-by-Step Process Instructors Use While Teaching Kids Pottery
Step 1: Introduction to Clay
Every pottery session begins with helping kids explore the clay. Instructors encourage them to press, roll, and poke it to understand its texture. This warm-up helps them get comfortable with the material.
Step 2: Learning Basic Techniques
Instructors teach simple techniques such as:
-
Pinch pots
-
Rolling coils
-
Flattening slabs
-
Creating textures
These techniques are given fun names to keep kids entertained—like “clay snakes” for coils or “pancake clay” for slabs.
Step 3: Making Simple Objects
Kids start with beginner-friendly items such as:
-
Bowls
-
Animals
-
Name tags
-
Ornaments
These simple projects are achievable and boost confidence.
Step 4: Decorating and Painting
Once the structure is ready, children delight in adding colours, patterns, and textures. Instructors provide:
-
Non-toxic paints
-
Glazes (for older kids)
-
Alphabet stamps
-
Pattern rollers
-
Natural textures (leaves, shells, etc.)
This stage enhances creativity and teaches attention to detail.
Step 5: Drying and Finishing
Depending on the studio, creations are air-dried or kiln-fired. Kids love returning the next day or week to collect their finished masterpieces—it gives them a sense of achievement and excitement.
Classroom Environment That Makes Learning Fun
A Cheerful, Artistic Atmosphere
Pottery studios designed for kids often include:
-
Brightly coloured tables
-
Fun aprons
-
Display walls with children’s artwork
-
Soft background music
A warm, creative environment motivates children and helps them express themselves freely.
Group Activities and Collaboration
Team-based activities encourage social skills. Kids may work together to build:
-
Clay villages
-
Animal families
-
Forest scenes
This teamwork fosters communication, cooperation, and creative thinking.
Short and Engaging Sessions
Children have short attention spans, so pottery classes are designed to last 45–60 minutes. Instructors break sessions into small segments—exploration, shaping, decorating—to maintain energy and interest.
Safety and Cleanliness
Safety is a priority. Instructors use:
-
Non-toxic clay
-
Rounded tools
-
Easy-to-clean workstations
Kids are also taught simple cleaning habits, which promotes responsibility.
Fun Project Ideas Instructors Commonly Use
-
Clay owls, turtles, and cats
-
Diya making for Diwali
-
Christmas ornaments
-
Friendship day tokens
-
Nameplates and initial pendants
-
Fairy houses, dragon eggs, unicorn sculptures
These projects not only entertain children but also help them develop new skills.
Benefits of Pottery for Kids
Pottery offers a wide range of developmental benefits, including:
-
Improved hand–eye coordination
-
Enhanced fine motor skills
-
Better focus and patience
-
Boosted creativity and imagination
-
Stress relief and emotional expression
-
Increased self-esteem
-
Problem-solving and planning skills
These benefits make pottery one of the most valuable creative activities for children.
Tips for Parents Choosing a Pottery Instructor
-
Look for a friendly, patient instructor with experience teaching kids.
-
Check if the studio is safe, colourful, and child-friendly.
-
Ask about the types of projects and clay used.
-
Attend a trial class to see how your child responds.
-
Ensure the class size is small for personalised attention.
Conclusion
Teaching pottery to kids is an art that requires creativity, patience, and a playful approach. Skilled instructors make the learning journey exciting by using storytelling, fun tools, sensory exploration, and hands-on activities. Pottery not only entertains children but also plays a major role in enhancing their creativity, motor skills, confidence, and emotional well-being. Whether a child makes a simple bowl, a colourful animal, or a magical creature’s house, every creation becomes a proud moment that stays with them long-term.
Pottery is more than just an activity—it’s a joyful learning experience that nurtures imagination and shapes young minds in beautiful ways.
FAQs
1. What age is best for kids to start pottery?
Kids can begin as early as 3–4 years old using soft clay and simple tools.
2. Is pottery safe for children?
Yes, instructors use child-safe tools and non-toxic clay suitable for all ages.
3. Do kids need previous experience?
No experience is required. Pottery is beginner-friendly and intuitive.
4. How long does a pottery project take?
Most projects take 30–60 minutes, though some may require multiple sessions.
5. What type of clay is best for kids’ pottery?
Air-dry clay and soft modelling clay are ideal for younger children.
6. Can pottery help with child development?
Absolutely. It improves creativity, focus, motor skills, and emotional expression.


Leave a Reply